During the development of your projects, it is often beneficial or required to utilise multiple repositories containing source code for multiple projects, reusable scripts, and additional resources required to build, test, and publish your code. In this post, I'm going to share how you can utilise multiple repositories in your pipelines to slimline your dev ops processes.
Basic pipeline
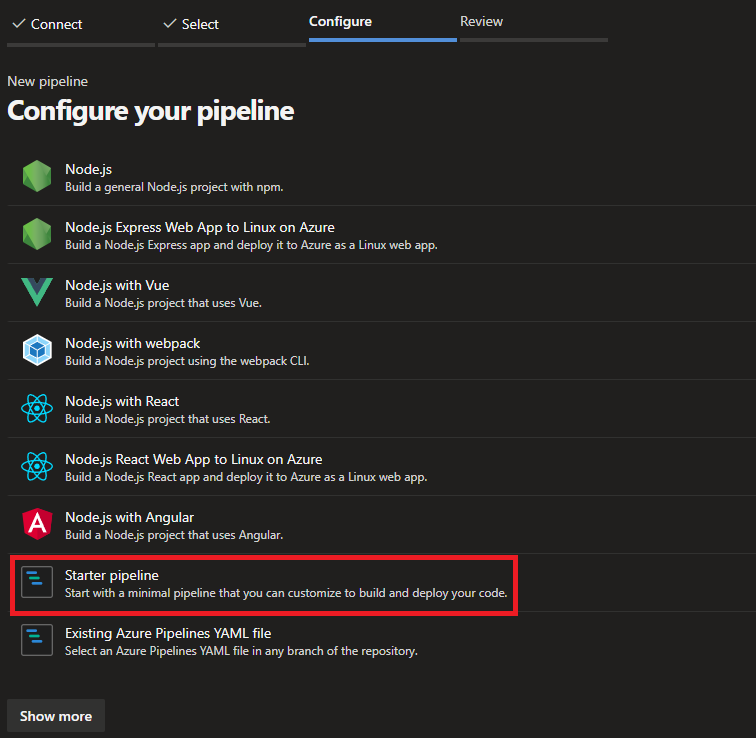
First, create a pipeline from the starter pipeline in Azure Dev Ops:

It should produce something similar to this:
trigger:
  - main

pool:
  vmImage: ubuntu-latest

steps:
  - script: echo Hello, world!
    displayName: "Run a one-line script"

  - script: |
      echo Add other tasks to build, test, and deploy your project.
      echo See https://aka.ms/yaml
    displayName: "Run a multi-line script"
This is a very basic pipeline, let's break it down:
The following determine the triggers of the pipeline. Anytime a check-in to the main branch occurs this pipeline will run. More information on triggers can be found here.
trigger:
  - main
The pool determines the Agent pool on which the pipeline runs. This one uses a Microsoft Hosted agent pool on the latest ubuntu image. You can of course customise the VM image or host your own pool. For more information on pools check out the documentation here
pool:
  vmImage: ubuntu-latest
Finally, the steps of this simple pipeline run a script that prints out some messages to the console. This is a very simple showcase to keep multiple repositories in scope. Have a read of the way pipelines can be utilised to build, test, deploy, and more with your code here.
steps:
  - script: echo Hello, world!
    displayName: "Run a one-line script"

  - script: |
      echo Add other tasks to build, test, and deploy your project.
      echo See https://aka.ms/yaml
    displayName: "Run a multi-line script"
Adding Repositories
So now let's get to it by adding additional repositories. To do so we can use the resources section.
resources:
  repositories:
    - repository: Shared
      type: git
      name: MyProject/Shared
      ref: main
In the above example, we are adding a repository name Shared that exists within the Azure Dev Ops project MyProject and uses the main branch.
This example is assuming that you are using a repository within the same project MyProject. We can however use repositories from different projects, or from different services such as GitHub; which is done similarly. Below shows brief steps for using repositories within different projects. If you want to utilise repositories from other sources please read more about this here.
- repository: OtherAzureRepo
  endpoint: OtherOrgAzureRepoServiceConnection
  type: git
  name: OtherProject/OtherAzureRepo
Once you have specified the repository in the yaml pipeline, you also require a service connection, this is can be done by following the documentation here.
Sharing templates
Now we can have some fun! Let's say that in the Shared repository we have the following template named SharedTemplate.yml:
parameters:
    name: output
    type: string

steps:
    - script: |
      echo This is the output for the template.
      echo ${{ parameters.output }}
    displayName: "Run a script within a template"
This template is still simple, it's taking in a parameter named output and prints it out to the console. Now we can call this template in our original pipeline.
 - template: SharedTemplate.yml@Shared
    parameters:
      output: "Called from a different repository"
All together
With everything together, the pipeline will look like this:
trigger:
  - main

pool:
  vmImage: ubuntu-latest

resources:
  repositories:
    - repository: Shared
      type: git
      name: MyProject/Shared
      ref: main

steps:
  - script: echo Hello, world!
    displayName: "Run a one-line script"

  - script: |
      echo Add other tasks to build, test, and deploy your project.
      echo See https://aka.ms/yaml
    displayName: "Run a multi-line script"

 - template: SharedTemplate.yml@Shared
    parameters:
      output: "Called from a different repository"
Conclusion
Utilising multiple repositories is useful, for example, you can create multiple shared templates that allow you to build, test, and deploy your solutions in a repeatable way across all your work, especially if you have multiple projects on the go at once. Additionally, you can also consume a tool or library in different repositories, and also deploy projects in different repositories.
The use cases of utilising multiple repositories allow for more advanced scenarios. You can find more information here to learn more about pipelines and to refer back to documentation when creating your own pipelines.
References
- learn.microsoft.com. 2022. Azure Pipelines documentation. [online] Available at: https://learn.microsoft.com/en-us/azure/devops/pipelines [Accessed 7 October 2022].
- learn.microsoft.com. 2022. Key concepts for new Azure Pipelines users. [online] Available at: https://learn.microsoft.com/en-us/azure/devops/pipelines/get-started/key-pipelines-concepts [Accessed 7 October 2022].
- learn.microsoft.com. 2022. Specify events that trigger pipelines. [online] Available at: https://learn.microsoft.com/en-us/azure/devops/pipelines/build/triggers [Accessed 7 October 2022].
- learn.microsoft.com. 2022. pool definition. [online] Available at: https://learn.microsoft.com/en-us/azure/devops/pipelines/yaml-schema/pool [Accessed 7 October 2022].
- learn.microsoft.com. 2022. Check out multiple repositories in your pipeline. [online] Available at: https://learn.microsoft.com/en-us/azure/devops/pipelines/repos/multi-repo-checkout [Accessed 7 October 2022].
Comments
Be the first to comment!